Pages

Wednesday, November 18, 2015

The Statement Clutch: One Thimble Issue 9


Hi! it's Merav from Baby Hobbes Design and I had the pleasure to review The Statement Clutch by Two Pretty Poppets from the new issue of One Thimble Digital Magazine, issue No. 9  


You can purchase your copy of One Thimble here, and you will receive 14 PDF including:

– Cross Bow Dress (size 0-8)
– Pseudo Smocked Romper (size nb-3)
– Ringmaster Top (size 1-10)
– Ringmaster Pants (size 1-10)
– Timeless Treasures Skirt (size 1-10)
– The Carnival Jacket (size 3-12)
– Vincent the Victor Free Motion Applique
– Trapeze Eloise Free Motion Applique
– The Statement Clutch
– Good Fortune Headwrap
– Festive Felties *
– Cheeky Monkey Softie
– Vintage Circus Sit Upon
– Circus Toss Game

The Statement Clutch By Two Pretty Poppets


This was my first time sewing a clutch-and I found the pattern perfectly fitted for the advance beginner, ready to be challenged. The Statement Clutch PDF is constructed of 3 different sized patterns. I chose to sew the largest Clutch, to showcase my pretty Sis Boom fabric, Nostalgia Kumi in pink and green. The focal oval in the front flap-meant to host a turn-lock and the wrist band, offers the seamstress an opportunity to introduce a complimentary print. I used Sis Boom Nostalgia Tilly in Gold.


The clutch variation in size enables you to create either a carry-all day clutch (see how much extra room I have in my large clutch after I placed my keys and phone in it); or you can sew the smallest clutch and still house your overs-sized phones.


The Clutch Patterns calls for a Turn-Lock closure. Unfortunately my two local craft stores were out of them, so I decided to finish my clutch using magnetic snaps instead. Also, I opted to change up the wrist strap a bit. I attached the D-Ring to the actual wrist strap. Then I sewed my Swivel-Hook into the lining of my purse, this way I can hook and secure my keys and other important straps inside my clutch. I am loving this hidden add-on!


:
(From left to right) First, I snapped the magnetic snap on to the inside center bottom of the flap. Then I matched the flap snap with the front snap (snapped on the right side). Once I was happy, I covered the flap with the oval shape and sewed as described in the pattern. 


I am also a stickler for fabric placement, especially when I sew with a large print. I often trace my patterns on a pre-folded piece of wax paper and then cut out the entire shape of the clutch piece (the PDF prints only half) so I can have a better visual of the placement. Notice hat I even included the tab placement? I added that so I would place my flower bouquet on top of it. I know it didn't photograph translucent, but wax-paper, found in your local supermarket is a great alternative to tracing paper.


I just LOVE the lining finished look! There is something so special when you open a purse/clutch/bag and the inside is just as pretty as the outside.


But I dig the outside MORE....


I have to add that my favorite part during the construction was in the final moments; when I pulled the right side (outside of the clutch) through the lining. It was like MAGIC the way that it unfolded out of the wrong side of the lining. Just breathtaking!


Well, that's it from me and The Statement Clutch from Two Pretty Poppets. Check out the rest of the One Thimble, Issue No. 9 blog tour here and don't forget to enter he Rafflecopter Giveaway below for your chance to win a free copy of One Thimble Digitel Magazine. Good Luck!


Happy Sewing,
-Merav @ Baby Hobbes Design


a Rafflecopter giveaway


Monday, November 16, 2015

Nostolgic about my Gabriella Fae


My best friend since Middle School is Gabriela; well now she goes by Gabi. She transferred into our school in 7th grade and quickly became my bestie. We did everything together-her parents used to call us "an old married couple" because we were inseparable. Though it's been almost 15 years since we lived in the same time zone, I cherish our friendship and reminisce about our endless days together. One of our favorite past times was to wander around mall (yes, we were in the burbs of Long Island) while talking about clothes and the new style trends.

These days, my partner in fashion is my little 3 and a half foot tall Hobbes. We shop for fabric and talk about how to compliment and mix print. When Sis Boom Nostalgia arrived, with it's soft pastel hues and large, bold flowers, I knew I wanted Hobbes to be involved in the dress making process. This time around (and with direction) she choose the pattern and the fabric placement. I was ecstatic when she chose Sis Boom Gabriella Fae; it reminded me of my favorite past time with my dear friend, Gabi. Kind of makes me nostalgic!

(Hobbes switching the Nostalgia fabrics in and out of Gabriella Fae waistband placement)


I was delighted when Hobbes chose for us to sew the Gabriella Fae PDF dress pattern. The Holidays are approaching and I wanted her to have a new dress for our Thanksgiving table. The scoop neck, empire bodice and the zipper back, along with the Nostalgia fabrics and the added lace trims (see how-to add the lace trim below) helped shape this dress into a One Of A kind, special occasion dress.    

(Since Hobbes measures the same in chest/waist and hips, I chose to shorten my zipper to end at the gathered skirt)


I love that this patterns sports sleeves in multiple lengths-perfect for year round dresses. We chose to sew long sleeve, leaving an inch off so we can add the 1 and 1/4 wide lace to the sleeve edge. The dress can be sewn in multiple lengths too. If you have your kid handy, you can measure down from the waist to your desired length. For my daughter, with a waist 21 and height 41.5, I chose to cut the 3T in the fully lined flat bodice and 16 inch length for the skirt.


The dress bodice can be made using 2 different cuts. One is a smooth outer layer, like the one Hobbes and I made cut in order to add trim in the center. You can also chose the second option for a gathered front bodice for the perfect ruched look. There is even an option to add a bow at the waistband. So many possibilities! 


To create the trim for a flat bodice overlay and the sleeves, please follow the instructions below:

Looking at the picture below, and starting from LEFT:
After you cut your flat bodice piece, measure how wide of an overlay you would like. For Hobbes size 4 bodice, I cut roughly a 2 and 1/4 piece and added an inch to the length. Make sure your design is centered.
Next, fold your edges under-1/4 on each side. Find the center of your bodice and place the overlay on top. Pin in the center.
Cut two strips of lace-I like to cut about an inch longer so I can then match the curves on both sides. Tuck the lace under the folded edge, 1/4 of an inch on each side. Pin and sew.


To add a lace trim around the sleeves, see picture below. Staring from the LEFT:
Take your raw end of your sleeve, right side up. Lay your lace piece right side down. Pin and Sew with a 1/4 inch seam allowance.
Fold over the lace, so that the seams are under. Press and top stitch 1/8 of an inch to tack it down. 
*I added the lace before I saw the sleeves closed. It's much easier that way. When you do close your sleeves, make sure you match the lace and the sleeve hem.


There you have it! Now you can embellish your Gabriella Fae's sleeves and bodice just in time for the holidays. I hope you love it just as much as Hobbes and I do. And if you are sewing with your mini-me, share your pictures here. 

Happy Sewing,
-Hobbes and Merav @ Baby Hobbes Design

As always, I love hearing from my crafty friends. Follow me at Baby Hobbes Design on Facebook or instagram @babyhobbesdesign for updates, pattern review, One of A Kind dress-sales and giveaways.
Special thanks to my friends at TKPhotography Chicago for these gorgeous card-ready photos.
And if you don't own it, get your copy of Sis Boom Gabriella Fae Here


Thursday, November 12, 2015

Luna Luna! You had me at Hello!!! And YOU can WIN one too!


Hi! It's Merav from Baby Hobbes Design, thrilled to share my Luna(s-yep, get ready to pluralize it-you just can't make one) with you. When Amy, over at Brownie Goose Patterns asked me to review her brand-spanking new pattern, I literally squealed. Back in October, I saw a sneak of the new pattern over at the Brownie Goose Online Showcase, with its angled, squared yoke, side panels, and swing-ability, I knew I had to sew one (or 3 and counting) up for Hobbes.


The Luna had me, right off the back, with its Princess Seams panels. I love how there are many options--almost like a puzzle--to showcase different prints and create dramatic movements within the flowy swing dress. I dove in Full Throttle with my just-arrived Wonderland fabrics by Katarina Roccella over at Art Gallery Fabrics. I have waited months for this print to show up at my doorstep, and the Luna pattern complemented the large bold prints with it's frame-like appearances.


Oh, and let's talk about the front and back angle-square yoke: It's screaming "center of attention" right? Just imagine the moments you can create adding trims, buttons and embroidery to capture the upcoming Holiday Season. For more example, click here to see more amazing photos over at the Brownie Goose Lovers page.
***The lining of the Yoke adds the opportunity for hidden seams-the dress is constructed beautifully inside and out.


If you squint your eyes, you might be able to make out the letters on the buttons. Yep, they're engraved with Baby Hobbes Design!
The dress calls for a button closer on the back, and I was so excited to show off these new beauties. I feel so branded! However, if you are like me-about this time two years ago and the thought of sewing buttonholes sends your running in the other direction-you can create a loop using bias tape or elastic to loop around the button, sew a hook and eye or insert a KAM snap to close up the back. 


The Luna offers you 2 different views. Hobbes and I are all about the elbow length sleeves! It's Chicago, after all, and November usually means 1st sight of Snow (NOOOOOOOOOOO!!!!!). But if you aren't snow-ridden like us or you love the layered look, check out View B with it's built-in angle-flutter sleeves. Amy, you are a genius with the princess seams and flutters!


I must add that in true Brownie Goose style, this dress is NOT a fabric-hoarder. Actually, I was quite surprised that for Hobbes (size 3 chest, 4 in length measurements) I just needed a smidge over 1/2 yard salvage to salvage width piece for my two skirt pieces and about 2/3 of a yard for the corresponding fabrics.  This dress makes a great stash buster too!

Want a chance to recreate THIS look? Enter the Rafflecopter below for your chance to win a Free copy of Brownie Goose Luna and 3 yards of Art Gallery Wonderland fabrics in the same prints I used to create Hobbes Luna dress.


Special thanks to my friends Tiana and Thomas over at TKPhotography - even past her bed time, you always know how to get Hobbes to shine!
Love Hobbes's Halo, check out Little Sparrow Bows Boutique for M2M hair pretties for every dress.
Thank you to the Amazing folks over at Art Gallery Fabrics for contributing to the giveaway-and for creating beautiful fabrics. 
Baby Hobbes Design is not affiliated with Brownie Goose Patterns. I received a complimentary copy to review. 


a Rafflecopter giveaway

Tuesday, November 3, 2015

Fringe Romper Gone WILD-Stretching your pattern bucks all season long.


 Fringe Romper Gone WILD 


Sometimes when I love a pattern so much, I just have to expend on it. Nothing crazy, but in my tradition of stretching out OUR pattern bucks-I wanted to try to add sleeves to the already adorable and trendy Fringe Romper from Brindille  & Twig.

With my Crazy for Cat theme, from my Freshly Picked Moccasins Giveaway (read here) I decided to Up-cycle my beloved PAWS Chicago shirt (my how our life changed from that 1st race my husband and I did with our 4-legged first child, Calvin the Beagle pup) for my son to enjoy. Here is how I stretched out my long sleeved shirt to fit the 18-24month Fridge-less romper pattern.


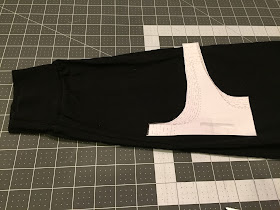
Step 1: Cutting: Lay your shirt flat. Measure the pattern against the shirt for where to cut. I quickly noticed that the romper pattern is too long for my shirt, so I decided to cut it into 2 pieces, 1 upper chest/bodice piece and 1 torso/leg piece. I decided to cut right under the arm holes-leaving enough room to attach the two pieces. When cutting, be sure to add your seam allowance. For mine, I added 1/4 of an inch to each raw end-about the amount that is sewn on my serger. Repeat this with pattern front and back.


Step 2: Cut the sleeves: Place the top your arm opening from the bodice piece against the pre-made sleeve piece. To do this, you have to have an idea of how long you want your sleeves to be. I decided on Elbow length for Liam. I measured up and placed the top of the pattern piece on top of the sleeve fold. Then I continued the angle to match my sleeve. Since my sleeve width is wider than my arm hole opening, I plan to cut it off.


Step 3: Sewing the bodice to the torso: Once you have your new pieces cut to your liking, you are ready to sew: Take your front bodice and your front torso/leg pieces with the right sides together-raw edges together: pin and sew. Remember, you are just sewing the added seam allowance (1/4 for me on the serger).


Step 4: Top stitch: Once you have one front piece and one back piece, top stitch your seam allowance down. I love it with a double needed-it looks so professional.


Step 5: Sew your front and back pieces together, at the top like instructed in the original fringe pattern. Once you have that, turn it right side out.

Step 6: Adding your sleeves. You would add sleeves like you would do with a long sleeve shirt. Find the center of your sleeve. Pin it the shoulder seam on your top bodice, with the right sides together. Continue to pin the sleeve all the way around the curve of the arm opening. Sew in place and repeat with other sleeve.


Step 7: Turn your romper wrong side out. Starting at the sleeve, sew down the entire side of the romper, like instructed in the original pattern. Repeat other side. Continue with the rest of the Fridge Romper pattern instructions for neck band and leg opening.

Now you are DONE with your up-cycle Sleeved Fridge(less) Romper:


Digging this "Walk Like An Egyptian" pose!


 Liam saying bye-bye!

Would love to hear from you! Tell me what you think about stretching your pattern bucks? Follow me on Facebook: Baby Hobbes Design or an Instagram @babyhobbesdesign
Special thanks to my friends at TK Photography Chicago for capturing my sweet and wild child.

Happy Sewing!
xoxo
Merav @babyhobbesdesign